Once you have created your own custom table the list of records from this table can be display in many places and in many formats such as; list views, charts and pivot tables.
Lets say you created a custom table named "Service Calls" there are two places you would like to see your service call records:
In a mater list ( All records ) which displays all the service call records in the current database.
In a minor list which displays only the service calls attached to the current contact, company, group or opportunity.
To turn on the master list using ACT's native navigation bar follow these steps:
Go to the TOOLS menu and select IMPACT...
Select the TABLES section from the left tab
Place a check mark in the MODE column ( it will now read "Enhanced" )
Click the OK button
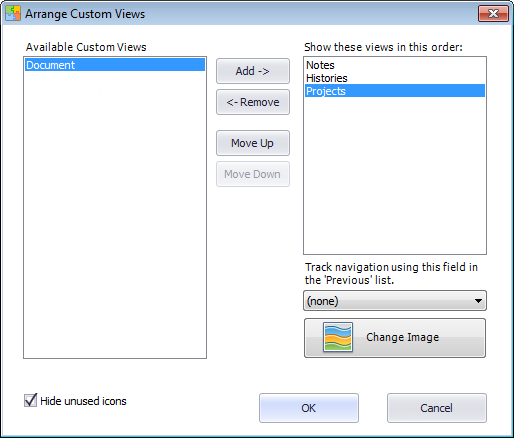
To turn on the master list using Impacts new navigation bar follow these steps:
On the navigation bar click on the ARRANGE link ( its just below the 'Search' icon )
Select your desired table from the list on the left
Click on the ADD button to move it to the right side
Click on OK button to close
On this form you can set the position of the icons by using the 'Move Up' and 'Move down" buttons. You can also the the icon image by clicking the "Change Image" button. For best results the image should be 32 x 32 pixels.


 Email This Article
 Previous Article
 Next Article