You may need to attach multiple contact to the some record under a different category system. Here are two exampled:
You have an opportunity where multiple contacts in the same company are attached but you want to designate the decision maker versus the technicians.
You create a custom table for building houses. Each job may have multiple tradespeople; foundation, framers, roofers, electricians, plumbers, painters, carpenters, ect. Any one contact in your database may be a carpenters on one job and the framer on another.
You create a custom table for real estate transactions. You attached multiple attorneys, one for the buyer and one for the seller. On any particular real estate transaction one attorney in your contact list may be the buyers then on another transaction may be the seller.
On these conditions the ID/Status field would not work since changing any single contact record to "Plumber" would also change all the other jobs. This happens because Act does not have any mechanism to track what type of relation when multiple contacts are attached . Impact has a work around for these conditions.
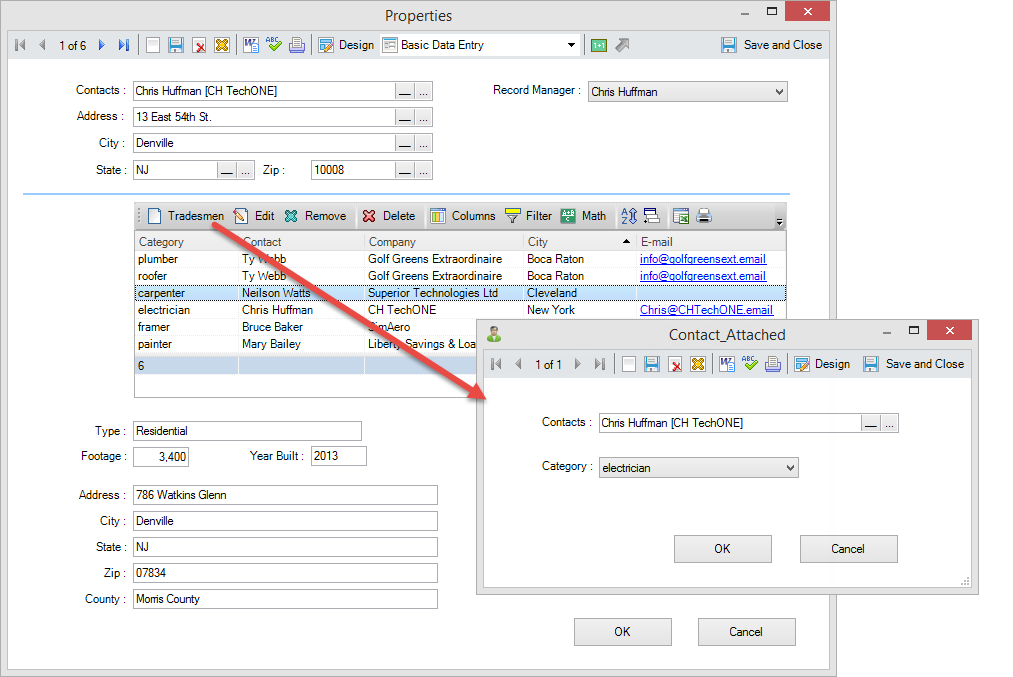
You need to crate a new custom table which will act like a bridge table between the job and the contact. This bridge table holds only one field lets call it 'Contact_Attached' ( Or something similar) then create one drop-down field in that custom table named "Category" ( or something similar)
In the screen shot below we have a list of contacts/Tradesmen attached and what role/category they are assigned to.
Notice we can have one contact attached twice to the same project under different categories.
To add a new contacts/Tradesmen click on the NEW icon 1) Click on the "New" icon in the toolbar 2) From the contact picker select your desired contact 3) From the Category drop down select your desired category/role. 4) Click OK
By default only the category field is displayed. To add the contact fields follow these steps: 1) From the toolbar click on COLUMNS then select 'Customize current layout' 2) Place a check mark in 'Contact" option in the middle 3) Now select your desired contact fields from the list on the left.
If you selected contact, company, city and email from the contact table your list will appear the same as the screen shot above.


 Email This Article
 Previous Article
 Next Article